Showing posts with label apples. Show all posts

10/26/10

TWD: All-American, All-Delicious Apple Pie

"It's like rain on your wedding day
It's a free ride when you've already paid
It's the good advice that you just didn't take
Who would've thought ... it figures"

Remember that mid 90's Alanis Morissette song, "Ironic"? The thing I remember most about it is my Middle School English teacher insisting to us that most of the lyrics were not in fact examples of Irony at all, but that's beside the point. Sadly the lyrics sort of sum up my week, you see today is my pick for Tuesdays with Dorie and I've been so excited about picking for literally two years now and ironically (or is it ironic? my brain has clearly atrophied since I received a B.A. in English three short years ago), my kids have been sick all week and I have had no time to bake! While, normally, a measly cold wouldn't keep me out of the kitchen, Eloise got a stomach virus on Wednesday and of course passed it to Helen. And just when they started to get over it, Eloise's cold turned into an ear infection, which, of course, transformed back into a stomach virus! Anyway, I had been dreaming of making this pie just about every single day since I picked it at the end of September but didn't actually get to round up all of the ingredients and get down to business until Monday afternoon. I ended up making the crust during Helen's nap while Eloise sat whining on my hip and then later assembled the pie during Eloise's nap while trying to keep Helen's little germy hands out of the sugar coated apples! Needless to say, my results were less than stellar. The pie tasted good, but it sure wasn't pretty!


Now, let me rewind a bit and say that, first of all, I LOVE apple pie. I really, really love apple pie, and I would choose it over any other dessert, even those involving chocolate (which is saying a lot!). In fact, when I was little, I often would request apple pie in place of a birthday cake! So, I couldn't wait to try Dorie's version. Now while I've made quite a few apple pies over the years, I've never made a double crusted one. Usually, my mom tops her pies with a lattice crust, and, every Thanksgiving, my Uncle Mark makes his famous Dutch apple pie with a crumb topping, so I've always stuck to either lattice or crumbs because they're the only two I've really felt confident doing. Well my friends, there is a reason that I never tried the double crust. I know that if I'd had a little more time and and a little more energy and, perhaps, if I had had a little less chaos in my kitchen, then I would have had a little more success with this pie. And, let me just say, making a double crust is not what one might call, "easy as pie". Shortly after it entered the oven, my vents caved in and the whole thing just kind of fell apart. The good news is that Dorie's Good for Almost Everything Pie Crust is really just that- with that much butter it would be nearly impossible for the finished product not to be flaky and delicious!
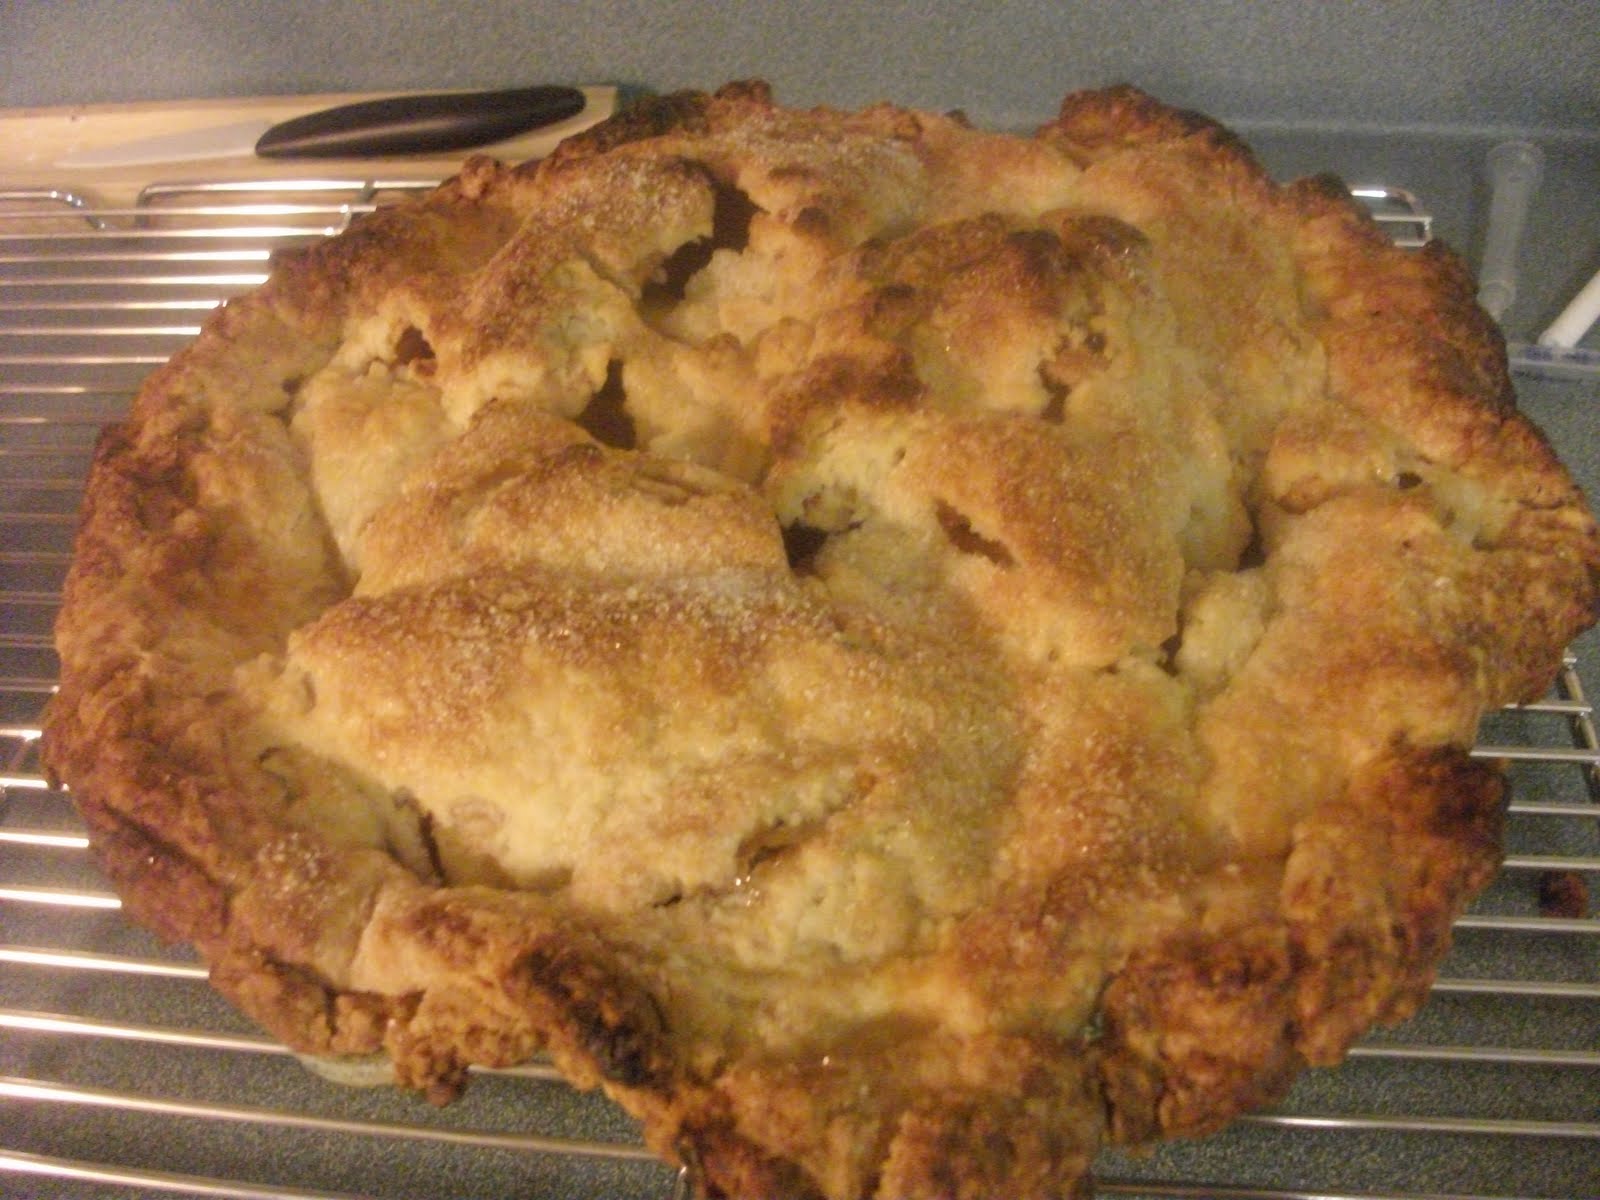

Now I'm still a little on the fence about the filling. You see, I've never used tapioca in a fruit pie before- I've always sprinkled a tablespoon or two of flour in with my apples. While the tapioca did not change the flavor of the filling, it did cause the apple juice to gel more than I'm accustomed to. I can't say that I disliked it, and it certainly wasn't gummy or gloppy like I feared it might be, but I missed that looser, juicer filling. I completely forgot the graham cracker crumbs that were supposed to be on the bottom crust, but my crust still stayed pretty sturdy, so I don't think that was too big of a loss. I really loved how Dorie calls for so many apples to "mound" over the crust. I don't usually use six apples in my pies, but I thought it gave a perfect ratio of fruit to crust. I went with Dorie's suggestion to use a variety of apples (yet another first for me) and ended up using Honeycrisps, Galas, Macintoshes, and Fujis- this was another wonderful improvement because it allows the filling to have so many different textures and flavors.

So, all in all, the pie was a success, and, although it turned out somewhat unattractive (ok, it was ugly), I am determined to try the double crust again... you know when the baby I'm pregnant with now is in Middle School and I have an hour or two to myself! Thanks everyone for baking along with me this week- I hope you have a wonderful new recipe for your Thanksgiving feast this year!!

All-American, All-Delicious Apple Pie
from Dorie Greenspan's Baking From My Home to Yours

For a 9 inch Double Crust

3 cups all purpose flour
¼ cup sugar
1 ½ tsp salt
2 ½ sticks very cold unsalted butter, cut into tbsp size pieces
1/3 cup very cold vegetable shortening, cut into 4 pieces
About ½ cup ice water

Put the flour, sugar, and salt in a food processor fitted with a metal blade, pulse just to combine the ingredients. Drop in the butter and shortening and pulse only until the butter and shortening are cut into the flour. Don’t overdo the mixing- what you’re aiming for is to have some pieces the size of fat green peas and others the size of barley. Pulsing the machine on and off, gradually add about 6 tbsps of the water- add a little water and pulse once, add some more water, pulse again and keep going that way. Then use a few long pulses to get the water into the flour. If, after a dozen or so pulses, the dough doesn’t look evenly moistened or form soft curds, pulse in as much of the remaining water as necessary, or even a few drops more, to get a dough that will stick together when pinched. Big pieces of butter are fine. Scrape the dough out of the bowl and onto a work surface.

Divide the dough in half. Gather each half into a ball, flatten each ball into a disk and wrap each half in plastic. Refrigerate the dough for at least 1 hour before rolling (if your ingredients were very cold and you worked quickly, though, you might be able to roll the dough immediately: the dough should be as cold as if it had just come out of the fridge).

To Roll Out the Dough: Have a buttered 9 inch pie plate at hand.

You can roll the dough out onto a floured surface or between sheets of wax paper or plastic wrap or in a rolling slipcover. If you’re working on a counter, turn the dough over frequently and keep the counter floured. If you are rolling between paper, plastic or in a slipcover, make sure to turn the dough over often and to life the paper, plastic, or cover frequently so that it doesn’t roll into the dough and form creases.

If you’ve got time, slide the rolled out dough into the fridge for about 20 minutes to rest and firm up.
For the Pie

4 pounds (about 6 very large) apples
3/4 cup sugar
Grated zest of 1 lemon
2 tablespoons quick-cooking tapioca
1/2 teaspoon ground cinnamon
1/8-1/4 teaspoon freshly ground nutmeg
1/4 teaspoon salt 2 tablespoons graham cracker crumbs (or dry bread crumbs)
2 tablespoons cold unsalted butter, cut into bits

For the Glaze (optional)
Milk or heavy cream
Decorating (coarse) or granulated sugar

Getting Ready: Butter a 9-inch deep-dish pie plate (I use a Pyrex pie plate). If you want to use a standard 9-inch pie plate, just reduce the amount of filling by about one quarter.

Working on a well-floured surface (or between wax paper or plastic wrap), roll out one piece of the dough to a thickness of about 1/8 inch. Fit the dough into the buttered pie plate and trim the edges to a 1/2-inch overhang. Roll the other piece of dough into a 1/8-inch-thick circle and slip it onto a baking sheet lined with parchment or a silicone mat. Cover both the circle and the crust in the pie plate with plastic wrap and refrigerate for about 20 minutes, while you preheat the oven and prepare the filling. (If it's more convenient, the crust can be well covered and kept refrigerated overnight.)

Getting Ready to Bake: Center a rack in the oven and preheat the oven to 425 degrees F.

Peel, core and slice the apples. You've got a choice for slicing: you can cut each apple in half and then slice each half crosswise or lengthwise into slices about 1/4 inch thick, or you can cut the apples into chunks about 1/4 to 1/2 inch on a side. In either case, put the apples into a large bowl and add the sugar, lemon zest tapioca, cinnamon, nutmeg, and salt. Toss everything together really well- I do this with my hands. If you've got a little time, let the mix sit for about 5 minutes, until juice starts to accumulate in the bottom of the bowl.

Remove the pie plate and top crust from the refrigerator and put the pie plate on a baking sheet lined with parchment or a silicone mat. Sprinkle the crumbs evenly over the bottom of the crust-this will help keep it from getting too soggy (some sog is inevitable)- and then turn the apples and their juices into the crust. The apples will heap over the top of the crust. Pat them into an even mound. Dot the apples with the bits of cold butter.

Very lightly moisten the rim of the bottom crust with water, then center the top crust over the apples. (If the crusts-top and bottom- are still very cold and in danger of cracking when you work with them, let them sit at room temperature for about 5 minutes.) Either fold the overhang from the top crust under the bottom crust and crimp the crust attractively, or press the top crust against the bottom crust and trim the overhang from both crusts even with the rim of the pie plate. If you've pressed and trimmed the crust, use the tines of a fork to press the two crusts together securely.

Use a sharp paring knife to cut about 6 slits int eh top crust. I always use the wide end of a piping tip to cut a circle out of the center of the crust as a steam vent. if you'd like, brush the top crust with a little milk or cream and sprinkle it with sugar.

Bake the pie for 15 minutes. Lower the oven temperature to 375 degrees F, and bake the pie for another 50 to 60 minutes (total baking time is between 65 and 75 minutes), or until the crust is gorgeously browned and the juices bubble up through the top crust. After about 40 minutes in the oven, if the top crust looks as if it's browning too quickly, cover the pie loosely with a foil tent.

Transfer the pie to a rack and let it rest until it is only just warm or until it reaches room temperature.

10/5/10

TWD: Double Apple Bundt Cake


Another amazing bundt cake from Dorie! This is a perfect cake to bring in the fabulous Fall weather we are finally getting here in New Orleans! The cake contains both grated apples and apple butter so it stays beautifully moist for at least four days (as long as ours lasted!). A few people thought the cake was maybe a little too sweet, but I used an unsweetened apple butter with no spices and I thought the sweetness level was spot on. I did sub 1/4 cup of brown sugar for some of the white and I might even sub more next time- I love the combination of brown sugar and apples! I also upped the spices just a little since my apple butter was so plain. I The cake is studded with pecans and raisins with add a really great textural contrast. Thank you Lynne of Honey Muffin for choosing this week's Tuesdays with Dorie cake!

9/28/10

TWD: Tarte Fine


I really, really want to make my own puff pastry. However, it's one of the many things on my baking/cooking to do list that I have to put on hold for awhile- at least until everyone's on the same nap schedule. So when I looked at the recipe for this week's Tuesdays with Dorie pick I immediately felt a little torn. Don't get me wrong, Dorie actually recommends using store-bought puff pastry...but she is extremely specific about using all butter puff pastry AKA not Pepperidge Farm puff pastry and that is the only brand that I could find in three grocery stores. Although I felt kind of defeated, I went ahead and bought the Pepperidge Farm puff pastry and of course, it was completely fine! I will go back one day and do this with homemade puff pastry and I'm sure it will be amazing but it was fine with store-bought, non-all butter crust.


This is an extremely easy tart to throw together (especially with the store bought puff pastry). I decided to make my tart long and skinny so it would be easier to slice into pieces. Dorie gives alternative instructions for making a sweeter tart and once I sliced up my beautiful Mcintosh apples and tasted how very tart they were I realized that I would have to go that route. The dough is dotted with a bit of butter and sprinkled with sugar and then lined with very thin slices of apple. Before popping it in the oven the apples are brushed with melted butter and sprinkled with a bit of sugar. The tart is baked until the apples brown and the pastry is puffed. I liked the tart- I wouldn't say I loved it, but it was very tasty. Derrick, on the other hand, ate 3/4 of tart within an hour of it coming out of the oven which is actually a good thing because this is not a keeper- it should be eaten quickly because it goes soggy after a few hours.

Thanks Leslie of Lethally Delicious for a lovely segue into Fall!

8/17/10

TWD: Oatmeal Breakfast Bread


Now that school is back in session I've been making a lot of muffins, breads, biscuits, etc. lately for breakfast. I've been trying to stock my freezer full of things that Derrick can grab on the way out the door, eat on the way in to school, or eat during his planning period...but, my plan is not working. You see, Derrick is about the size of a beanpole with the appetite of an elephant so every time I pull a batch of 12 muffins or 8 biscuits out the oven imagining that we'll have enough for today and the rest of the week they mysteriously disappear before they are cool enough to wrap up and freeze! Of course, the kids aren't really helping out with my plan either...and let's face it, now that I'm in the 2nd trimester and still nursing Eloise, I'm pretty hungry too, so I guess I can't blame it all on the husband!

Anyway, this bread fit nicely into my breakfast baking bonanza. It was soft, incredibly moist, flavorful, and not too unhealthy so it was pretty much finished off before I could really get a good picture of it! Some of the fat is replaced by unsweetened applesauce and I ended up subbing half the white flour for whole wheat flour and fat free plain yogurt for buttermilk just to up the health factor. Dorie says you can use any type of dried fruit but all I had on hand were big, plump raisins so mine wasn't too exciting- I'd love to try cherries or apricots.

I actually ended up making these again as muffins but I did about forty-million substitutions- peach puree for applesauce, prunes for raisins, and a bunch of different spices and they still turned out really delicious! The only problem I found with the muffins was that they were so soft that some of them stuck to the pan- not that that stopped them from being eaten in one day... Seriously, I don't know how to fill the man up!

Thanks Natalie of Oven Love for choosing this versatile and delicious recipe for this week's Tuesdays with Dorie pick!

5/18/10

TWD: Apple Apple Bread Pudding


Wow, I have been totally slacking with Tuesdays with Dorie! Don't get me wrong, I actually made both the Burnt Sugar Ice Cream and the Quick Classic Berry Tart and I even took pictures (not good pictures...) and then I just could not get a post up in time. I've been so insanely busy- May is always a wild month- but that's really no excuse. So last night after I put the girls to bed and whipped up a four layer chocolate cake for my brother Jordan's 23rd birthday, I decided that I had to make this Apple-Apple Bread Pudding and actually post on it! The thing is, I don't really like bread pudding so I wasn't too excited about this recipe. But you know what? I was pleasantly surprised! I mean, I still don't love the consistency of bread pudding, but the flavor was great. I used some homemade challah for this recipe and I think that really added to the success of this bread pudding.


The pudding is a layer of challah spread with apple butter topped with caramelized apples and another layer of challah spread with apple butter. A mixture of cream, milk, eggs, and egg yolks is then poured over the entire thing and is left to soak for about 30 minutes before being baked in a water bath. I think the chunks of caramelized apples really enhanced the texture of the bread pudding. Thanks Elizabeth of Cake or Death? for picking this very nice recipe.

1/12/10

Happy 2 year (and 1 week) Birthday TWD!


Surprise, surprise, I'm late with my Tuesdays with Dorie post! This should have appeared last Tuesday, when the Tuesdays with Dorie baking group was celebrating it's 2nd birthday...but things kept turning up and while I was able to bake on schedule I couldn't figure out how to get the pictures off my new camera and onto my computer.

Because this was TWD's 2nd birthday, our fearless leader, Laurie, of Slush decided to let us bake two treats this week! The first selection is Cocoa Buttermilk Cake, which as you can see I turned into cupcakes. These were truly delicious, they were incredibly moist and the cocoa flavor was really delicate and wonderful. I actually made my own buttermilk by adding a tablespoon of lemon juice to one cup of regular milk and it worked perfectly (although I imagine real buttermilk would have yielded even better results). The recipe calls for a chocolate frosting with malt powder and I would actually love to try it out sometime but I was unable to get my hands on it this week so I stole Tracey of Tracey's Culinary Adventure's idea of topping the cupcakes with peanut butter frosting. Wow! it that is a recipe that I will use all of the time now- so easy and such perfect flavor and consistency. I brought these to my dear friend Sadiha for her 25th birthday and they were a big hit! I'm thinking about making this as an actual cake for Helen's upcoming 2nd birthday.


The second selection was a traditional French Tarte Tatin or upside down apple tart. You melt a stick of butter and 3/4 cup sugar in a cast iron skillet on the stove and then place peeled, quartered pieces of apple in the pan and let it caramelize before laying the pie dough over the top of the apples and baking it in the oven. My apples took a good 20 minutes to caramelize but I really wanted to make sure that I achieved a nice deep amber color. Dorie says that you can use puff pastry, sweet tart dough, or good for anything pie dough and I decided on the good for anything pie dough. The last time I made Dorie's good for anything pie dough I was a little disapointed with the results, but this time I used a pastry cutter instead of the food processor and the crust was amazing. It puffed up with all kinds of buttery layers almost like puff pastry! The hardest part, of course, was flipping the tart out of the skillet but I did it quickly and only lost a tiny corner! This was by far one of my favorite recipes to date! I shared the tart with my parents, brother, sister, Derrick, and Helen and it disappeared very quickly! If I had left it at home I think I would have eaten the entire thing instead of the one slice I allowed myself (in keeping with Ten in 10!)


So thank you Laurie, and thank you Dorie, and of course thanks to all of the other TWD bakers who make baking through Baking From My Home to Yours so much fun!

11/10/09

TWD: Cran-Apple Crisp


We were supposed to be hit by a hurricane or tropical storm last night, luckily, the storm changed its course and largely dissipated before it hit shore. The unusual thing about Hurricane Ida is that it came at the bitter, bitter end of hurricane season. Growing up in New Orleans, we learned to always hope for the best and to prepare for the worst when a storm heads our way and in lieu of recent storms (ahem Katrina) the city has been especially cautious when anything begins to brew in the Gulf. Because of all of this, Derrick's school closed yesterday just in case the winds got bad enough for driving to be dangerous. Of course, the teachers still had to go in to "prepare" their classrooms so I decided to pack the babies up and go into school with him. It was really fun for the four of us to spend a Monday together even if we were just unplugging computers and moving filing cabinets away from windows. It's so funny how starved I've become for even the most boring outings!

Because I stay home with the girls, our family of four lives off of Derrick's teacher salary (practically nothing...haha); thus, we share one car. When Derrick leaves at 7:15am we say goodbye to all forms of transportation other than the double stroller until between 5:30-8:00pm depending on the day. We take LOTS and LOTS of walks. Seriously though, the three of us are always ready to get out of the house even for the most mundane of activities.

Besides walks to the park and reading books, one of Helen's new favorite things to do during our days at home is help Mommy bake. Baking, for Helen, means one of two things A) sitting on the counter to watch while I mix, measure, and stir or B) gathering up as many cooking utensils as I will allow her to borrow and "baking" pretend cakes on the kitchen floor. The other day, as I peeled and chopped apples for this week's scrumptious Tuesdays With Dorie recipe, Cran-Apple Crisp, Helen was busily stirring her "cake" on the floor when I looked down and discovered that she had gathered up a bunch of pieces of apple peel that had fallen from my cutting board and had mixed them with a stray button, a penny, and a guitar pick in her bowl. To Helen, this is baking, this is what it looks like I'm doing when I bake- pulling out random bags of powders, mashing up sticks of goo, throwing in berries!


This week's recipe was chosen by Pam of Cookies with Boys - it is a mix of apples, fresh cranberries and a bit of sugar topped with a crumb mixture composed of butter, flour, oats, coconut, cinnamon, brown sugar, and ginger. The mix of tart and sweet is just magical! This is such a fantastic Fall dessert- I couldn't recommend it more! Not only is the crisp delicious, it is extraordinarily simple to make, especially if you have a little baking apprentice on the premises.

10/4/09

Magazine Mondays: Applesauce Cake

We got a teeny tiny taste of Fall last week- it only lasted about three days- but I made good use of the cool weather and took the babies on plenty of nice long walks. I also felt better about turning on my oven to make this delicious Applesauce Cake (recipe here) from Everyday Food. I love that magazine and I'm finally participating in Magazine Mondays a fun and relatively informal (I need all the flexibility I can get these days!) event hosted by Cream Puffs in Venice, a blog which I have followed for a very long time! . Anyway, this is an old magazine recipe from October 2005 which means that I must have gotten it back when I was in college and my life looked like this:


Don't worry, we didn't burn the whole forest down...I don't think... But seriously, about two months after this picture was taken (at my graduation party) I did this:


Then about nine months later I did this:

Sixteen months after that, I did this:


Now here I am with a three month old and 19 month old baking Applesauce Cakes out of old magazines that I kept telling myself to throw away and snapping hasty, out-of-focus pictures of them to upload to my sometimes interesting, sometimes bare bones blog. This is a delicious cake, easy to make, and perfect for welcoming Fall.


9/15/09

TWD: Flaky Apple Turnovers


I can't believe that I started this blog over a year ago! I have done a lot of baking in the last year and most of it I owe to Tuesdays with Dorie. This group has forced me to really stretch out of my baking comfort zone and learn how to do things I always wanted to know how to do but never made time for. These apple turnovers are a perfect example: I've made tons of apple pies, in fact I LOVE apple pie, but I've never done individual turnovers. First of all there's no pie plate or tart pan to shape the crust, and then there's the fact that you have to make a bunch of tiny individual turnovers instead of one big pie. Basically, I would have never taken the time to make these if Julie of Someone's in the Kitchen had not picked them. Thank goodness she did!


These are terribly labor intensive but also very delicious. The dough consists of three sticks of butter cut into flour and then mixed with sour cream and a little sugar. You wrap the dough in saran wrap, stick it in the fridge for a few hours, roll it out and then fold it like a business letter, stick it back in the fridge for a couple hours, roll it out again and cut it, fill it, and bake the turnovers. I made mine into triangles even though Dorie instructs the baker to make them into little half circles. I think I would do these as crescents next time because I think I'd be able to fit more apple into them. The only change I made to the recipe was increasing the 1/4 tsp of cinnamon to 1/2 tsp and honestly I might even increase that a bit more next time- but I'm sort of a cinnamon freak.
One of the greatest things about this recipe is that it makes around 16 large turnovers and you can freeze the turnovers unbaked for up to two months and take them directly out of the freezer and pop them in the over anytime! I have about 12 in the freezer right now, just waiting for a dessert rainy day!

8/18/09

TWD: Applesauce Spice Bars


This week's Tuesdays with Dorie recipe was chosen by Karen of Something Sweet by Karen. I was really excited when I saw that this recipe had finally been selected because the picture in the book looks so delicious! So in actuality these are delicious but not spectacular. I think that I was partially a bit disappointed because they are really more of a thin cake than a bar. Basically, this is an apple cake with applesauce in the batter and bits of apple, raisins, and pecans scattered throughout- the flavor is quite delicious and very autumnal and it makes a good breakfast too! I'm trying to convince myself that I have eaten almost half of it by myself in order to keep my milk supply up for this plump little gal:
I think I will heed the advice of some other TWD bakers and make this in an 8x8 pan instead of a 9x13 next time so that I can get a more substantial "cake". The cake is topped with a tasty brown sugar glaze that sort of sinks into the cake and I think that doing the cake in an 8x8 would also allow for a little thicker layer of glaze. All in all this was a good and very easy recipe that has me looking forward to the Fall and some cool weather!


6/9/09

TWD: Parisian Apple (and Nectarine) Tarts


This week's Tuesdays with Dorie recipe was selected by Jessica of My Baking Heart. I was really excited when I read the recipe because 1) it looked delicious and 2) it looked sooooo easy! Seriously, the only ingredients are puff pastry, butter, brown sugar, and the fruit. Ok, so even though this was insanely easy to throw together I still managed to make it somewhat complicated... I blame the 15 month old pulling at my pants leg the entire time I was trying to put this together. The first thing I did wrong was coring the apple (I have no idea why but I always screw up when I core fruit)- I ended up with a mauled apple half instead of the perfect little apple blossom featured in the book. I did an even worse job with the nectarine tart- the pit made the fruit look very sloppy. But my really pregnancy-brain related mistake was putting the tarts on waxed paper instead of the parchment paper called for in the recipe- of course I ended up with a kitchen filled with smoke and a lovely smokey odor in my home for the rest of the morning! Believe it or not the tarts still turned out nicely! The brown sugar and butter makes a wonderful caramel glaze on the fruit and the result is simply delicious!


I used Peppridge Farm puff pastry even though Dorie specifically says that the tarts are only good with all butter puff pastry. I'm sure that she's right and that if I had an all butter puff pastry to compare it to that I would be disappointed with the Pepperidge Farm pastry- but honestly, it was all that my grocery store carried and I thought it tasted great! I used the extra little puff pastry scraps to wrap my mauled apple and nectarine pieces that didn't make it into the regular sized tarts. I thought these were a great and easy little treat!

5/27/09

Daring Bakers: Apple Strudel


This was such a great challenge!! I was so excited when I saw that Courtney of CoCo Cooks and Linda of Make Life Sweeter chose a traditional apple strudel recipe for the May Daring Bakers challenge. I admit that I was very nervous about mixing and rolling the dough because I have never made anything even close to pastry like this before. However, I was pleasantly surprised to discover that the dough was extremely easy to work with! Ok, let me back up, this is not an easy recipe. In fact, it took me about four hours start to finish to do the whole thing, but, the recipe is straightforward and the dough is easy to stretch very thin.

I let my dough rest for about an hour while I made the filling for the strudel and I think this really helped to relax the gluten enough to roll the dough thin enough for me to see the pattern of the tablecloth through it!


I was also very nervous about folding the filling into the dough because it was so delicate but again, I had nothing to worry about, because the instructions were so easy to follow!


My strudel baked up to a nice golden brown color. I let it sit for the prescribed 30 minutes before cutting into it and wow was it tasty! I thought it tasted best right after I made it while the pastry was still very crisp and the filling was still warm but Derrick preferred it the next morning after the pastry had softened a little (he also insisted that the filling tasted sweeter after it sat a bit). Needless to say Derrick, Helen Mae, and I finished the entire thing off in less than three days!
I will say that I did tweak the apple filling a little- I used vanilla instead of rum and I increased the cinnamon from 1/4 tsp to 1 tsp. I think that the rum really would have given the filling a much nicer flavor but I just couldn't bring myself to buy a whole bottle for a measly 2 tablespoons! I thought the filling was good but not great- I am definitely going to experiment with some different fillings (including some savory ones). I really loved the recipe for the pastry and I seriously cannot wait to make it again!! Thanks again Courtney and Linda!


The May Daring Bakers’ challenge was hosted by Linda of make life sweeter! and Courtney of Coco Cooks. They chose Apple Strudel from the recipe book Kaffeehaus: Exquisite Desserts from the Classic Cafés of Vienna, Budapest and Prague by Rick Rodgers.

Apple strudel
from “Kaffeehaus – Exquisite Desserts from the Classic Cafés of Vienna, Budapest and Prague” by Rick Rodgers

2 tablespoons (30 ml) golden rum
3 tablespoons (45 ml) raisins
1/4 teaspoon ground cinnamon
1/3 cup plus 1 tablespoon (80 g) sugar
1/2 cup (1 stick / 115 g) unsalted butter, melted, divided
1 1/2 cups (350 ml) fresh bread crumbs
strudel dough (recipe below)
1/2 cup (120 ml, about 60 g) coarsely chopped walnuts
2 pounds (900 g) tart cooking apples, peeled, cored and cut into ¼ inch-thick slices (use apples that hold their shape during baking)

1. Mix the rum and raisins in a bowl. Mix the cinnamon and sugar in another bowl.

2. Heat 3 tablespoons of the butter in a large skillet over medium-high. Add the breadcrumbs and cook whilst stirring until golden and toasted. This will take about 3 minutes. Let it cool completely.

3. Put the rack in the upper third of the oven and preheat the oven to 400°F (200°C). Line a large baking sheet with baking paper (parchment paper). Make the strudel dough as described below. Spread about 3 tablespoons of the remaining melted butter over the dough using your hands (a bristle brush could tear the dough, you could use a special feather pastry brush instead of your hands). Sprinkle the buttered dough with the bread crumbs. Spread the walnuts about 3 inches (8 cm) from the short edge of the dough in a 6-inch-(15cm)-wide strip. Mix the apples with the raisins (including the rum), and the cinnamon sugar. Spread the mixture over the walnuts.

4. Fold the short end of the dough onto the filling. Lift the tablecloth at the short end of the dough so that the strudel rolls onto itself. Transfer the strudel to the prepared baking sheet by lifting it. Curve it into a horseshoe to fit. Tuck the ends under the strudel. Brush the top with the remaining melted butter.

5. Bake the strudel for about 30 minutes or until it is deep golden brown. Cool for at least 30 minutes before slicing. Use a serrated knife and serve either warm or at room temperature. It is best on the day it is baked.

Strudel dough
from “Kaffeehaus – Exquisite Desserts from the Classic Cafés of Vienna, Budapest and Prague” by Rick Rodgers

1 1/3 cups (200 g) unbleached flour
1/8 teaspoon salt
7 tablespoons (105 ml) water, plus more if needed
2 tablespoons (30 ml) vegetable oil, plus additional for coating the dough
1/2 teaspoon cider vinegar

1. Combine the flour and salt in a stand-mixer fitted with the paddle attachment. Mix the water, oil and vinegar in a measuring cup. Add the water/oil mixture to the flour with the mixer on low speed. You will get a soft dough. Make sure it is not too dry, add a little more water if necessary.
Take the dough out of the mixer. Change to the dough hook. Put the dough ball back in the mixer. Let the dough knead on medium until you get a soft dough ball with a somewhat rough surface.

2. Take the dough out of the mixer and continue kneading by hand on an unfloured work surface. Knead for about 2 minutes. Pick up the dough and throw it down hard onto your working surface occasionally.
Shape the dough into a ball and transfer it to a plate. Oil the top of the dough ball lightly. Cover the ball tightly with plastic wrap. Allow to stand for 30-90 minutes (longer is better).

3. It would be best if you have a work area that you can walk around on all sides like a 36 inch (90 cm) round table or a work surface of 23 x 38 inches (60 x 100 cm). Cover your working area with table cloth, dust it with flour and rub it into the fabric. Put your dough ball in the middle and roll it out as much as you can.
Pick the dough up by holding it by an edge. This way the weight of the dough and gravity can help stretching it as it hangs. Using the back of your hands to gently stretch and pull the dough. You can use your forearms to support it.

4. The dough will become too large to hold. Put it on your work surface. Leave the thicker edge of the dough to hang over the edge of the table. Place your hands underneath the dough and stretch and pull the dough thinner using the backs of your hands. Stretch and pull the dough until it's about 2 feet (60 cm) wide and 3 feet (90 cm) long, it will be tissue-thin by this time. Cut away the thick dough around the edges with scissors. The dough is now ready to be filled.

9/18/08

Apple and Date Wondermuffins


Today is my little sister's 17th birthday- so Happy Birthday Madeline! She was hoping for a car but instead she got these glorious apple and date muffins! I think I really one up-ed her expectations- and you will think so too when try these out. Seriously, I did not know how high to set my expectations for these muffins because they call for whole wheat flour and only 2 tablespoons of butter... and well... that sounded sort like a healthy muffin. But have no fear! These muffins are really really wonderful.

I found them in a giant cookbook called, Cookies, irresistible biscuits, brownies, and bars by Hilaire Walden. Now this book has yet to give me a bad recipe (honestly- everyone should go out and buy it) , in fact, it holds my all-time favorite snickerdoodle recipe, my mom's go-to decadent fudge brownie recipe, and a really fancy white chocolate macadamia nut chocolate chip torte (that is a perfect party pleaser). SO... I felt pretty confident that even this seemingly health conscious muffin would be somewhere between OK and good. Well, it blew me away. The cinnamon and apple really shine through and make it a good Autumn morning breakfast treat. It is sweet without being the least bit "sugary" and it is dense without being at all "buttery"- and it was easy to make too!

So without further ado- here is the recipe with a few changes I made in parentheses:

Date and Apple (Wonder)Muffins

1 1/4 cups self-rising whole wheat flour (I couldn't find self-rising whole wheat so I added 1 1/4 tsp baking powder and 1/8 tsp salt to regular whole wheat flour)
1 1/4 cups self-rising white flour
1 teaspoon ground cinnamon (I used a very generous teaspoon)
1 teaspoon baking powder
2 tablespoons margarine (I used butter)
1/2 cup firmly packed light brown sugar
1 eating apple ( I used a large, firm Golden Delicious apple and it worked beautifully)
1 cup apple juice
2 tablespoons pear and apple spread (I actually used an organic morello cherry fruit spread)
1 egg, lightly beaten
1/2 cup chopped dates
1 tablespoon chopped pecans (I used slivered almonds on half and left the other half plain)

Preheat the oven to 400F. Arrange 12 paper liners in a deep muffin pan (I found that because my muffin pan is not very deep, I got about four extra muffins out of the batch). Put the whole wheat flour in a mixing bowl. Sift in the white flour with the cinnamon and baking powder. Rub in the margarine until the mixture resembles bread crumbs, then stir in the brown sugar (I used my hand pastry blender to mix in the butter, just because its not as messy, and I love my pastry blender).


Quarter and core the apple, chop the flesh finely and set aside (now the recipe did not specify as to whether you are supposed to peel the apple- I did because thought the skin my get a bit chewy or rough). Stir a little of the apple juice with the fruit spread until smooth. Mix in the remaining juice, then add to the rubbed-in mixture with the beaten egg. Add the chopped apple to the bowl with the dates. Mix quickly until just combined.


Divide the mixture among the muffin liners. Sprinkle the chopped pecans. Bake the muffins for 20-25 minutes (20 minutes did it for mine), until-golden brown and firm in the middle. Transfer to a wire rack and serve while still warm (they are really good warm and room temp. too).


And Helen Mae loved them too! Just kidding, I'm not a psycho mom- she's still sticking to the baby food


I have a huge tub full of chopped dates from Sam's Club, so expect to see more date recipes in the near future...